# 🧱 Creating a Workflow
Once you have access to the admin page (opens new window) you can begin creating your workflow. Once you log in to the admin page you will see a view more or less similar to this:
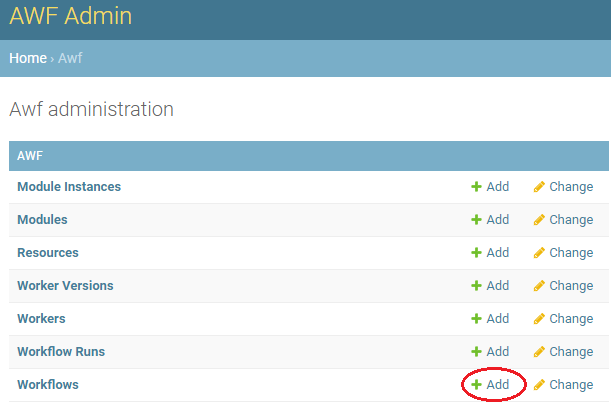
To create a workflow hit the ➕ add button next to the workflow tab
From here you are presented with a form to fill out to configure your workflow.
The required fields are printed in bold on the form and filled in as follows
| Field | Input Description |
|---|---|
| slug | The unique identifier of your workflow. Please use lowercase and "-" instead of spaces |
| label | The display name of your workflow, this name is displayed for your workflow on the AWF webpage |
| Description | A brief summary of the workflow, this summary is displayed on the workflow tile so it should be short but descriptive |
| Documentation | Documentation of the use and workings of your workflow, this documentation is rendered on the workflow page and should be written in Markdown (opens new window) |
| Discipline | The engineering discipline the workflow belongs to |
| Public | Check this box in order to display your workflows tile on the AWF webpage |
| Profile | he profile of your workflow, this should correspond to the profile of the worker you want to run the workflow on |
| Cleanup | Check this box in order to tell the worker it should delete all files when a workflow run is complete (leave unchecked for debugging and check when workflow is fully operationalized) |
| Config | The workflow configuration, indicating the series of steps that the workflow consists of (detailed further here) |
| Arguments | The workflow input arguments, indicating the input data that is required from a user when submitting a workflow run (detailed further here) |
| Demo output | Validating that you're workflow is healthy is extremely important, this field indicates several properties AWF will use for validation when running nightly QA test of your workflow (detailed further here) |
# 🔧 Workflow Configuration
The config field is the most important of your workflow as it specifies the actual steps taken when the workflows is run. Before diving into the actual configuration it is important to understand what a workflow consists of.
🙌 IMPORTANT
A workflow consists of a series of states (a.k.a modules) which define the work to be done in a single step.
These states themselves have inputs and outputs and are a logical grouping of activities.
Activities are the building blocks of a workflow and represent a unit operation that has be predefined (coded) in the AWF system.
To find out more about modules modules and activities go to the Modules And Activities section
The workflow configuration consist of a json which has 3 key properties:
- StartAt which defines the first state to be run as part of the workflow
- TimeoutSeconds which defines the maximum time the workflow is allowed to run
- States which contains the various state definitions
A simple workflow config can look like this
{
    "StartAt": "Modify file",
    "TimeoutSeconds": 864000,
    "States": {
        "Failure": {
            "Type": "Fail",
            "Cause": "$.error"
        },
        "Success": {
            "Type": "Succeed"
        },
        "Modify file": {
            "Next": "Success",
            "Type": "Task",
            "Catch": [
                {
                    "Next": "Failure",
                    "ResultPath": "$.error"
                }
            ],
            "Output": {
                "logs": [],
                "files": [
                    {
                        "name": "Tutorial_Results",
                        "path": "$WORKDIR/*"
                    }
                ],
                "parameters": [
                    {
                        "name": "output",
                        "path": "$WORKDIR/output.txt"
                    }
                ]
            },
            "Comment": "Run the tutorial workflow.",
            "Profile": "python",
            "Resource": "python:latest",
            "Resources": [
                {
                    "url": "https://gitlab.arup.com/awf/awf-tutorial/-/archive/v1.0.0/awf-tutorial-v1.0.0.tar.gz",
                    "filename": "tutorial"
                }
            ],
            "Parameters": {
                "script": "$MODELDIR/tutorial/tutorial.py",
                "exeArgs": [
                    "-i",
                    "$INPUTDIR",
                    "-o",
                    "$WORKDIR"
                ],
                "timeout": 7200,
                "version": "3.7",
                "requirements": "$MODELDIR/tutorial/requirements.txt"
            },
            "ResultPath": "$.result"
        }
    }
}
🤔 GOOD TO KNOW
This is actually the real configuration for the Tutorial workflow
💡 TIP
AWF's configuration is based on Amazon's state machine language within vscode (opens new window) there are several extension that can be used to validate and visualize your workflow. We recommend this one (opens new window) as it ignore the additional AWF properties that are added as well as let you edit the config through the visualizer <!-- ------------ADD GIF---------------------- -->
# State definitions
The state definition consists of a json object that defines the inputs and outputs of a state which module to run during the state and what to do when the state succeeds or fails.
Sample state definition.
{
    "State Name": {
        "Next": "Success",
        "Type": "Task",
        "Catch": [
            {
                "Next": "Failure",
                "ResultPath": "$.error"
            }
        ],
        "Output": {
            "logs": [...],
            "files": [...],
            "parameters": [...]
        },
        "Comment": "Add comments/reminders to your state for lated",
        "Profile": "python",
        "Resource": "python:latest",
        "Resources": [...],
        "Parameters": {...},
        "ResultPath": "$.result"
    }
}
The required properties for the state definition are as followed
| Property | Description |
|---|---|
| Next | Defines what state to run after the current state completes successfully |
| Type | Defines the type of the state. MUST be one of Task, Success, Fail |
| Catch | Defines what to do when state fails and where to store the error |
| Output | Defines the outputs of the state, see output for more details |
| Profile | Defines the state profile (icon that appears in the workflow diagram) MUST be one of arupcompute, athena, d3plot, fds, frew, grasshopper, gsa, javascript, ls-dyna, primer, python, radiance, reporter, rhino, speckle, t-his |
| Resource | Defines the module and version (in most cases latest) for the state (e.g. python:latest) |
| Resources | Defines the external resources required to run the state see output for more details |
| Parameters | Defines the input parameters for the module, see output for more details) |
| ResultPath | Defines where to store the parameter outputs of the state (detailed further here) |
For every workflow it is crucial to define a Success and Failure state as follows and to ensure that workflows end either with a success or failure
{
    "Failure": {
        "Type": "Fail",
        "Cause": "$.error"
    },
    "Success": {
        "Type": "Succeed"
    }
}
# Output
The output property is a object that defines what output from the state should be uploaded back to AWF.
There are 3 types of outputs defined in AWF:
- files defines result files and folders
- logs defines log files and folders
- parameters defines location of parameter files to read and extract parameter values
For both files and logs list entries are an object in the form of
{
    "name": "parameter name for file",
    "path": "path to file or folder, can contain wildcards '*' and '**' but use with caution"
}
when a folders or wildcards are indicated in the path property the worker will automatically create and upload these as a zip file using the name as the zip file name
For the parameters this is simply a list of file paths, these files are then read by the worker and added to the location specified in ResultsPath
# Resources
The resource property specifies a list of objects specified as follows.
{
    "url": "https://my-script-or-repo-url",
    "filename": "directory or file name to save data to"
}
These resources define the external resources needed for the state and are usually scripts/repositories (see script preperation) that are run as part of an activity.
The AWF worker will download these and store them in the worker's model directory with the name specified as filename, the downloaded content can subsequently be referenced using $MODELDIR/<filename>.
The worker will take care of unzipping the file/folder if necessary to you can directly access
📝 NOTE
These external resources are often referred to as models by the dev team
# Parameters
The parameters property is an object that define the input parameters for the modules in the form of key-value pairs.
These are often mapping the Workflow Arguments provided by the user to the arguments required by the modules.
{
    "module argument": "value",
}
# ResultPath
The ResultPath property (both in the state definition as well as in the Catch clause) define where in the workflow run arguments AWF should append the new state parameters that have been acquired.
When a state is completed AWF gathers the output parameters produced by the state. These are obviously read for the files defined in the *parameters property of the Output field. However AWF also creates additional output parameters from the result files defined in the Output field in the form of
{
    "<name>":{
        "type":"file",
        "value":"filename"
    }
}
These parameters are then written to the workflow run arguments at the location defined by ResultPath.
🙌 IMPORTANT
AWF uses jsonpath (opens new window) to read and write values to the workflow run arguments object for more details see Workflow Arguments
when using jsonpath it is important to not that $ indicates the root of the json object therefore specifying $ as the ResultPath is not usually recommended as this then overwrites all your workflow run arguments.
# System Variables
When configuring a workflow you will undoubtedly come across instances where you need to indicate file paths and properties that are only known to the AWF worker. For this reason AWF defines several system variables that can be used which are outlined here.
| Variable | Description |
|---|---|
| $MODELDIR | AWF worker model directory, directory it downloads the external resources to |
| $INPUTDIR | Workflow run input directory, directory where all workflow input files are downloaded to |
| $WORKDIR | Workflow run working directory, directory where output files should be created in |
| $APPLICATION_<app_name>_<app_version> | Path for a specific application app_name with version app_version installed on the worker machine |
# Workflow Argument
The arguments field defines a list of required inputs for your workflow.
An example argument definition
[
  {
    "name": "file",
    "demo": "demo-files/tutorial/demo.txt",
    "type": "file",
    "label": "Input file",
    "default": "",
    "required": true,
    "properties": { "extension": [".txt"] },
    "description": "A text file to run tutorial workflow on"
  }
]
The required fields are as follows
| Field | Input Description |
|---|---|
| name | The name of the variable used to reverence the argument |
| demo | The value to be used for the QA test, for argument of type file this must refer to an uploaded demo file see QA test configuration for more info |
| type | The type of the argument, MUST be one of string, number, file, list |
| label | The display label for the argument, this label is displayed for your workflow argument tile when the user enters the value |
| required | true if the argument is required from the user |
| description | A brief description of the workflow argument this is displayed on the workflow argument tile when the user enters the value |
| properties | Only needed for arguments of type file and list see properties for more details |
# properties
The optional properties field has a special meaning depending on the argument type
- When the
typeisfilethis is an object{ "extension": [".txt"] }which defines the allowed file extensions. - When the
typeislistthis is a `list{"label": "display name", "value": "selection value"}that defines the allowed values and their display label
# Workflow Run Arguments
When a workflow run is submitted these arguments are provided by the user and are ultimately passed to the worker running the workflow in the form:
{
    "name":{
        "type":"type",
        "value":"value"
    }
}
As the workflow progresses these arguments can be appended, updated and/or replaced as you see fit.
In order to assign these argument values to the various properties in your workflow config you can access the argument using the jsonpath
🙌 IMPORTANT
AWF uses jsonpath (opens new window) to read and write values to the workflow run arguments object
With jsonpath the $ denotes the root of the json and you can access the arguments by specifying $.name when name id the value provided for the name field in the arguments definition.
Examples of using jsonpath in AWF
Argument definition
  {
    "name": "file",
    "demo": "demo-files/tutorial/demo.txt",
    "type": "file",
    "label": "Input file",
    "default": "",
    "required": true,
    "properties": { "extension": [".txt"] },
    "description": "A text file to run tutorial workflow on"
  }
Workflow run arguments:
{
    "file":{
        "type":"file",
        "value":"test.txt"
    }
}
Workflow config parameter field
{
    ...,
    "Parameters":{
        "inputfile": "$.file"
    }
}
Workflow parameter field after evaluation
{
    ...,
    "Parameters":{
        "inputfile": "test.txt"
    }
}
You can play around more with jsonpath here (opens new window)
🙌 IMPORTANT
AWF takes care of extracting the value from the run arguments so you do not need to specify the arguments as $.name.value
# Demo output
The Demo output field is used to describe the max timespan your workflow will need during the QA test and the output file extensions and quantity it should generate. An example of this could be:
{
  "timeout": 300,
  "expected_output":
    {
      "*.txt": 1
    }
}